Realistic Pencil Drawing: How To Drawing A Wet Portrait
Last updated 11/2020
MP4 | Video: h264, 1280x720 | Audio: AAC, 44.1 KHz
Language: English | Size: 14.09 GB | Duration: 11h 11m
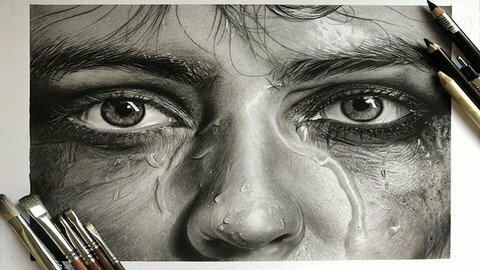
Learn How to Draw Realistic Portrait with Conte and Charcoal Pencil. The Secret to Drawing a hyperreal Portrait
What you'll learn
Learning how to draw skin textures, wetness on the face, creating water drops
The student will become very familiar with how to create eyes, nose, and face volume in the chiaroscuro technique
The student should be able to perform a textured and wet face with the chiaroscuro technique
Requirements
Fabriano Eller cardboard 220 grams
Hard and Soft Conte Fabriccastle pencils
Paris Carbonic Conte B2 or B3 Pencil
Flat and piped Cretacolor charcoal
Fader
Etude eraser
Faber dough eraser
Brush eraser
Electronic eraser
Sanding
Small cutter
Rough and flat tip brush in different sizes
Soft small brush
Printed picture of the model with adequate quality
Description
In this course, you'll learn how to draw realistic portrait with Conte and charcoal pencil from the ground up. The course is supported with over 11 hours of clear content that I walk you through each step of the way.Here's what you get with the course:- To create the model taught in this course, familiarity with the design principles and the basic steps of the chiaroscuro will definitely be useful.- This training consists of about 11 hours of the instructional video, including each step, which is the minimum time that the student must spend to achieve the desired result in creating the volume of the face and wet skin texture.- The following training course has been prepared with the aim of teaching how to draw skin textures, wetness on the face, creating water drops. In addition, the student will become very familiar with how to create eyes, nose, and face volume in the chiaroscuro technique.- In this course, we will teach you how to create eyes, eyebrows, nose, skin textures, wet textures on the skin, and water droplets using Conte pencils, charcoal powder, and a variety of brushes and erasers.- Students are taught how to create volume first and then model textures and water droplets on the work.- The student also gets acquainted with the use of different types of erasers in chiaroscuro and how to use them.- At the end of this course, the student should be able to perform a textured and wet face with the chiaroscuro technique. What else will you get?- Personal contact with me, the course tutor- Lifetime access to course materials- Understanding of how professional art is created- This all comes under one convenient easy to use platform. Plus you will get fast, friendly, responsive support on the Udemy Q&A section of the course or direct message. I will be here for you every step of the way!So what are you waiting for? Sign up now and change your art world today!
Overview
Section 1: Introduction
Lecture 1 Introduction
Lecture 2 Main Picture
Section 2: Sketching the right eye
Lecture 3 Drawing the right eye with a pencil
Lecture 4 Completing the iris of the right eye
Lecture 5 Shading the eye with brush and charcoal
Section 3: A foundation for eye's textures
Lecture 6 Creating a dark volume under the right eyelid
Lecture 7 Continue subcutaneous texture of the right eye
Section 4: Creating volume for the right side of the face
Lecture 8 Creating the volume of right side of the face
Section 5: Foundation of the eyebrow
Lecture 9 Subcutaneous of eyebrow
Section 6: Volume and textures for the right side of the face
Lecture 10 Completing the right eyebrow and creating the right volume of the forehead and u
Lecture 11 Creating a shiny texture on the eyelid
Lecture 12 Creating light inside the right eye and around the eye
Lecture 13 Creating shiny texture right side of forehead
Lecture 14 Drawing the inner corner texture of the right eye
Lecture 15 Drawing drop of water and completing the texture of the inner corner of the righ
Lecture 16 Start creating the linear texture under the right eye
Lecture 17 Creating fine lines under the right eye
Lecture 18 Creating volume and exposure to the eye texture in the lower right eye
Lecture 19 Learn to create fine linear textures under the eyes and drawing the right eyela
Lecture 20 Completing eyelashes and fine textures of the right eye
Section 7: Creating the water droplets and water texture
Lecture 21 Completing the texture created in the previous step by adding darkness
Lecture 22 Creating the subcutaneous of drops of running water on the right side of the fac
Lecture 23 Completing running water drops and water gender
Section 8: Completing the textures of the right side of the face and cheek
Lecture 24 Learn how to make a paper funnel and use it to create textures
Lecture 25 Continue creating the right cheek and lip texture
Lecture 26 Completing light and dark textures of cheek
Lecture 27 Creating the texture of the inner part of the right cheek with the eraser
Lecture 28 Continue to create the texture of the inner part of the right cheek with an el
Lecture 29 Lightening of right cheek texture
Section 9: Creating the volume and the texture of the nose
Lecture 30 Drawing the darkness of the tip of the nose with a charcoal pencil
Lecture 31 Shading and shaping the volume of the tip of the nose
Lecture 32 Shading subcutaneous of the nose blade volume
Lecture 33 Completing the darkness of the nose volume with charcoal and a brush
Lecture 34 Creating light to create nasal textures
Lecture 35 Creating intense light and subcutaneous of the drops on the nose
Lecture 36 Work with an fader to shape water droplets on the nose
Lecture 37 Completing the texture and drops on the nose
Section 10: Sketching the left eye
Lecture 38 Drawing the left iris with pencil
Lecture 39 Continue the left eye with a pencil
Lecture 40 Completing the iris of the left eye
Lecture 41 Completing the left eyelid
Section 11: Creating the left eyebrow, creating the volume of the eyelid and the forehead
Lecture 42 Create volume behind the eyelid and start drawing eyebrow hair
Lecture 43 Drawing the left eyebrow
Lecture 44 Drawing the left side of forehead
Lecture 45 Create a dark texture behind the left eyelid with a pencil
Lecture 46 Erasing the texture behind the eyelids and drawing the eyebrow hairs
Lecture 47 Completing the left eyebrow
Section 12: Creating wet hair on the forehead
Lecture 48 Completing the darkness of the forehead and draw the hair with a pencil
Lecture 49 Completing the wet hair on the forehead
Section 13: Creating the volume for the left side of the face
Lecture 50 Creating lower subcutaneous of left eye
Lecture 51 Volume the left side of the face
Section 14: Creating the skin texture on the forehead
Lecture 52 Creating skin lights on the forehead
Section 15: Completing the eyelashes and the foundation for water droplets on the left side
Lecture 53 Completing eyelashes and whiteness of the left eye
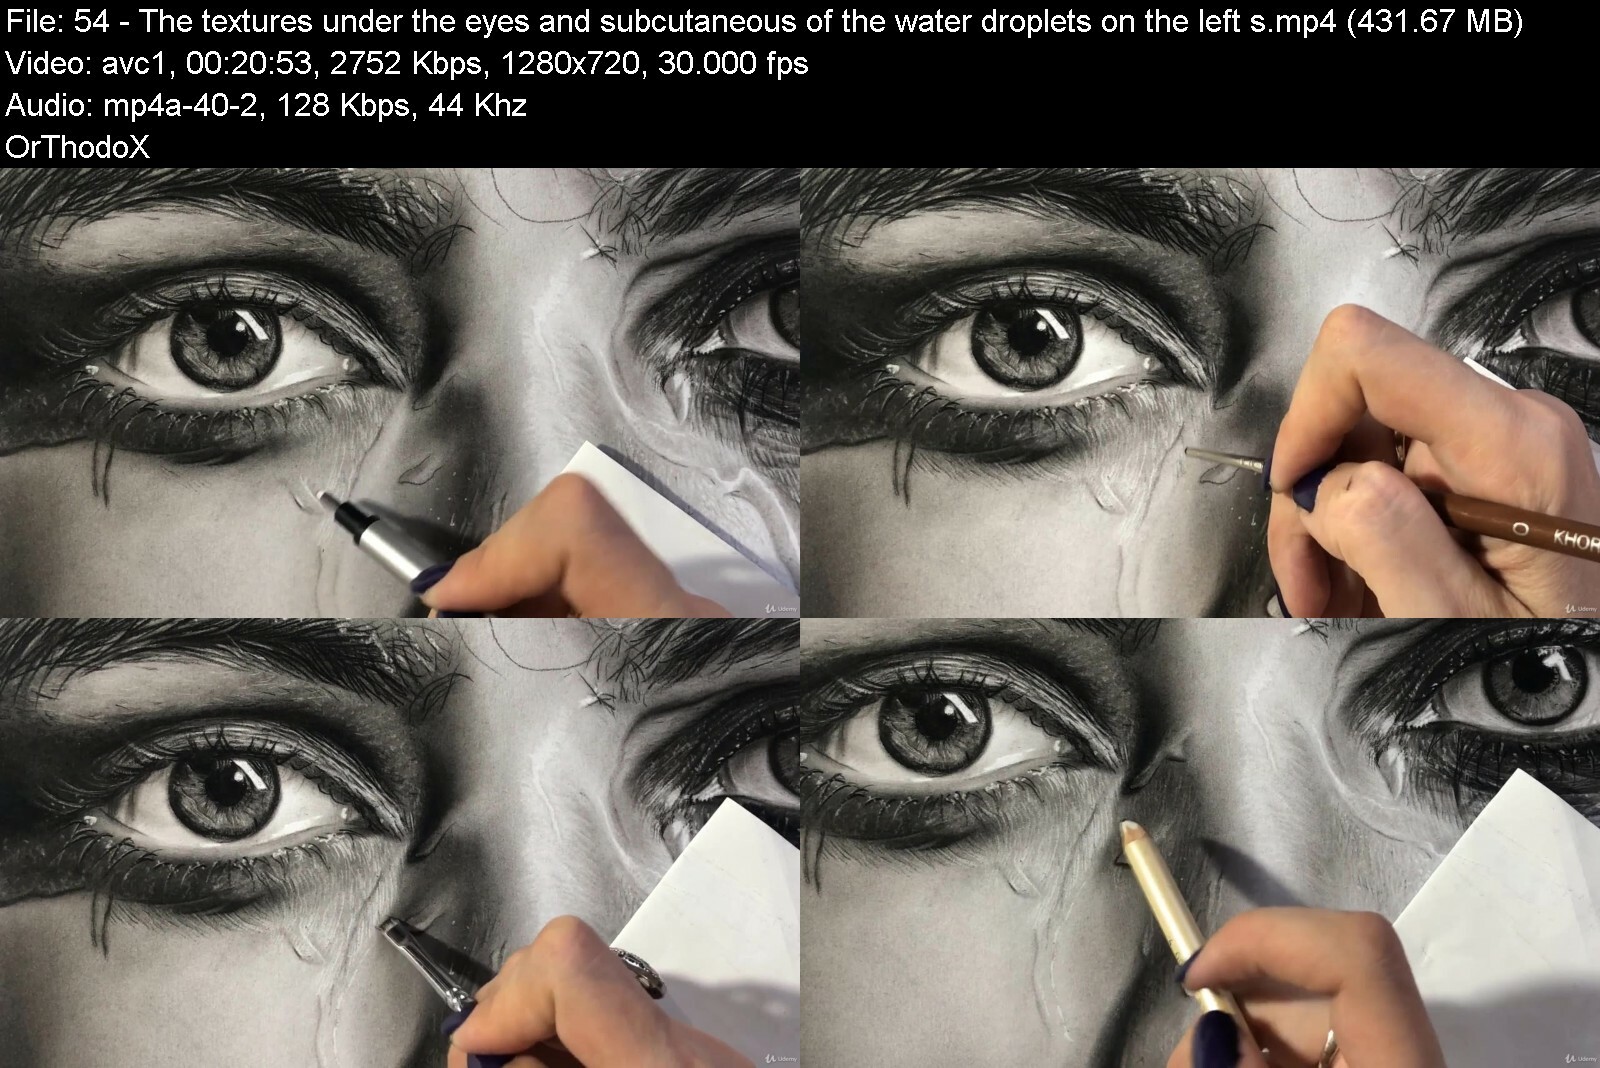
Lecture 54 The textures under the eyes and subcutaneous of the water droplets on the left s
Section 16: Completing the textures of the nose
Lecture 55 Completing the texture and darkness of the blade of the nose
Lecture 56 Final completion of nose texture
Section 17: Creating the textures for the left cheek
Lecture 57 Creating texture next to the nose on the left side of the face
Lecture 58 Create left cheek texture with eraser
Lecture 59 Continue to create textures on the left side of the face with a brush eraser an
Lecture 60 Completing the darkness and lightness of textures on the left side of face
Section 18: Completing the lights using different erasers and the white pen
Lecture 61 Completing the lights using a variety of erasers and white pens
Section 19: Final explanations and finishing the work
Lecture 62 Final explanations and completion of work
This course is suitable for students who have passed the beginner course of chiaroscuro or have a background in other painting techniques,This course is at a level that is suitable for students over 13 years old who can have a correct understanding of volume and texture,All students who are relatively familiar with drawing or who have already taken our sketching course can use the training in this course and be able to improve their artistic level by using more advanced levels of charcoal drawing course.
https://anonymz.com/?https://www.udemy.com/course/realistic-pencil-drawing-how-to-drawing-a-wet-portrait/

download скачать from RapidGator
https://rapidgator.net/file/40f0a43f5d01142b09f0485d916c03a6/Realistic_Pencil_Drawing_How_to_Drawing_a_Wet_Portrait.part1.rar
https://rapidgator.net/file/af88f7c8169f90c4575c10bded29f7ec/Realistic_Pencil_Drawing_How_to_Drawing_a_Wet_Portrait.part2.rar
https://rapidgator.net/file/506181210edf4040928d39e629afad22/Realistic_Pencil_Drawing_How_to_Drawing_a_Wet_Portrait.part3.rar
https://rapidgator.net/file/24281554fd088a92fd4bf41b93110acb/Realistic_Pencil_Drawing_How_to_Drawing_a_Wet_Portrait.part4.rar
https://rapidgator.net/file/bf3230c1b3d3923274bbbd42edcd2a5b/Realistic_Pencil_Drawing_How_to_Drawing_a_Wet_Portrait.part5.rar
https://rapidgator.net/file/b806ff74c7d7a17d276f1b7d2fc061b5/Realistic_Pencil_Drawing_How_to_Drawing_a_Wet_Portrait.part6.rar
https://rapidgator.net/file/4229d21c38c9b5e29cacee4ed0d80d03/Realistic_Pencil_Drawing_How_to_Drawing_a_Wet_Portrait.part7.rar
https://rapidgator.net/file/fb7e74c4e1fe3164c69a88c8a85e1f5b/Realistic_Pencil_Drawing_How_to_Drawing_a_Wet_Portrait.part8.rar
download скачать from DDownload
https://ddownload.com/kyk2l7d3aabn/Realistic_Pencil_Drawing_How_to_Drawing_a_Wet_Portrait.part1.rar
https://ddownload.com/byxza6evctx9/Realistic_Pencil_Drawing_How_to_Drawing_a_Wet_Portrait.part2.rar
https://ddownload.com/ow0revstci25/Realistic_Pencil_Drawing_How_to_Drawing_a_Wet_Portrait.part3.rar
https://ddownload.com/1xzanxgeue17/Realistic_Pencil_Drawing_How_to_Drawing_a_Wet_Portrait.part4.rar
https://ddownload.com/sdg3lzmss72b/Realistic_Pencil_Drawing_How_to_Drawing_a_Wet_Portrait.part5.rar
https://ddownload.com/u56j5usjpmzz/Realistic_Pencil_Drawing_How_to_Drawing_a_Wet_Portrait.part6.rar
https://ddownload.com/pnwvszi52b50/Realistic_Pencil_Drawing_How_to_Drawing_a_Wet_Portrait.part7.rar
https://ddownload.com/nlt8kb7fgnuk/Realistic_Pencil_Drawing_How_to_Drawing_a_Wet_Portrait.part8.rar

